Home Page › Forums › Discussion Topics – Ask the Experts › 62 Jetfire engine, trans, & turbo rebuild
- This topic has 69 replies, 8 voices, and was last updated 10 years, 10 months ago by
 jensenracing77.
-
AuthorPosts
-
July 31, 2012 at 9:18 pm #7450jensenracing77Participant
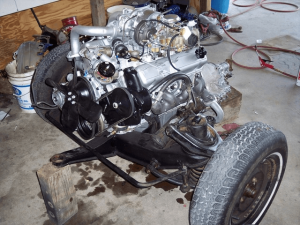
as much as i hate to say it, i have another delay. this time only two days. over the weekend i put much of the engine together. on Monday i talked to D&D and they said i put the head gaskets on upside down. these have metal on one side and fiber on the other. i put the metal to the head side and he said it goes to the block side. the felpro gasket instructions said if it is not marked then it don’t matter and these were not marked. i had to pull the heads back off. now it will be Wednesday night before i have the new gaskets. i have everything ready so when i have the parts i think i will still have it mostly done by Sunday. i won’t likely start it till the following weekend.
my transmission guy wants me to bring the engine and transmission to him after i have it assembled but before i put it in the car. he wants to be the one to adjust the linkage on the TV rod. i am sure i could get it close but he said i payed for a rebuild and that is part of it.
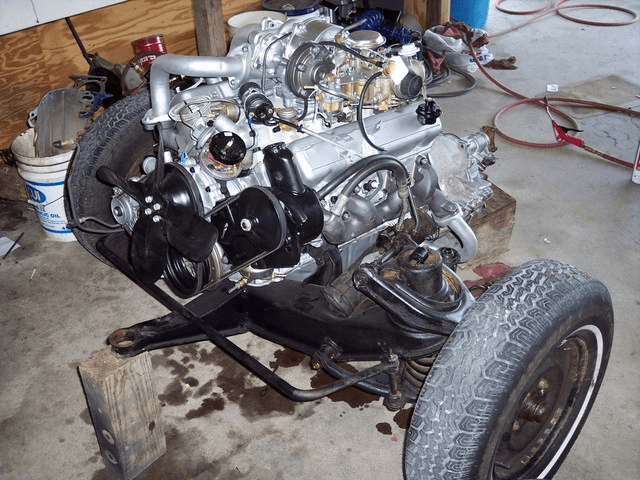
August 3, 2012 at 7:48 am #7451jensenracing77Participantmaking headway now. i may be able to start it Sunday but not sure yet. i never enjoy starting a fresh engine. between getting it started, timing it, and not letting it over heat, at the same time braking in the cam. also smelling the paint and oils burning off. i guess i like doing it but i am always glad when the break in is done.

Attachments:
You must be logged in to access attached files.
August 3, 2012 at 9:33 am #7452 macf85Participant
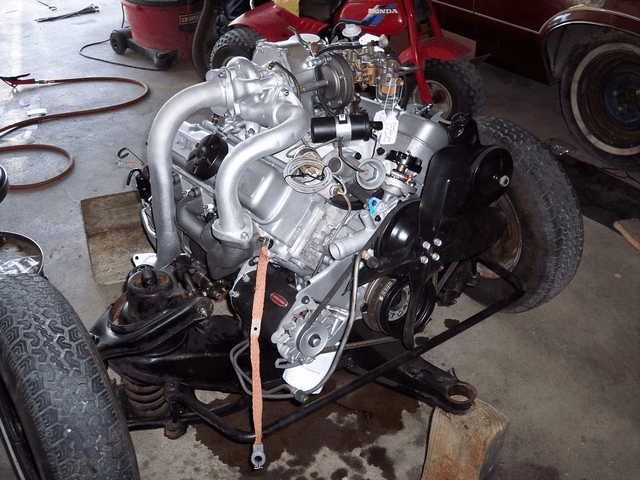
Looking good! If this is your first 215 build it’s critical to prime the Buick style oil pump. I pack the oil pump cavity around and in between the gears with petroleum jelly till its full with no air pockets. Then using a variable speed electric hand drill with an old flat head screwdriver as a bit, and drive the oil pump until through the distributor hole. I’m running an oil pressure gauge so it was easy to see if I was getting pressure and then run the drill for a couple of minutes until the oil passages are filled. That way you know for sure it’s primed before you start it.
Also, the rocker shafts on these engines carry oil through the hollow center and are prone to collecting sludge, particularly in the ends. It’s important to clean them with a rifle brush or something similar and some solvent.
I saw your concern about today’s oils. There are a bunch of zinc rich oils on the market or you could use zinc additive in the conventional oil.
You know you want to fire it up! It’s always rewarding to go from a pile of parts on the floor to a running engine.
August 3, 2012 at 11:53 am #7453 bcroejuno-comParticipant
I have primed a few such engines, by bringing up another car. I take out the oil
pressure switches, connect the 2 with a 6′ high pressure hose, and let the car idle
for a minute. Check the oil in the 215, when its up a quart, should be done. Spin
the 215 (no plugs) a bit, and the quart ought to transfer back. No need to take
the pump or distributor off. Bruce RoeAugust 3, 2012 at 4:09 pm #7454jensenracing77Participantthanks guys, i primed it till i had oil coming out each rocker on top. i have to go to work a half day today but i hope to have it in the car tonight and then finish hooking everything up Saturday.
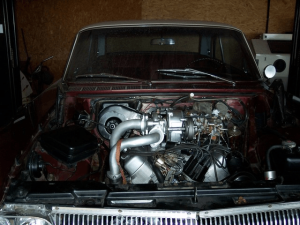
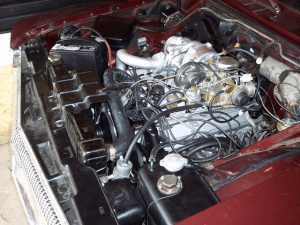
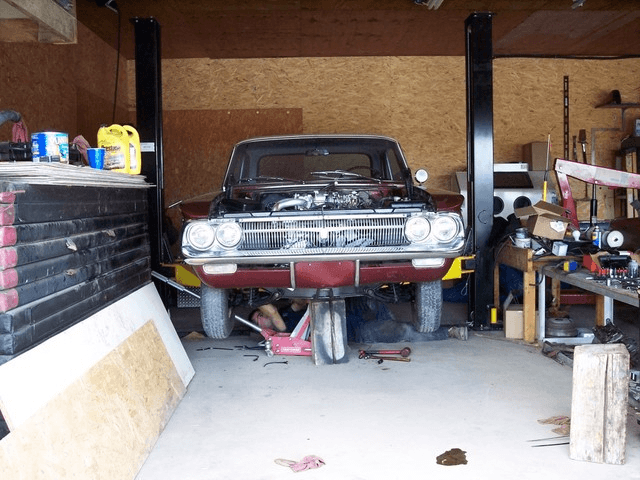
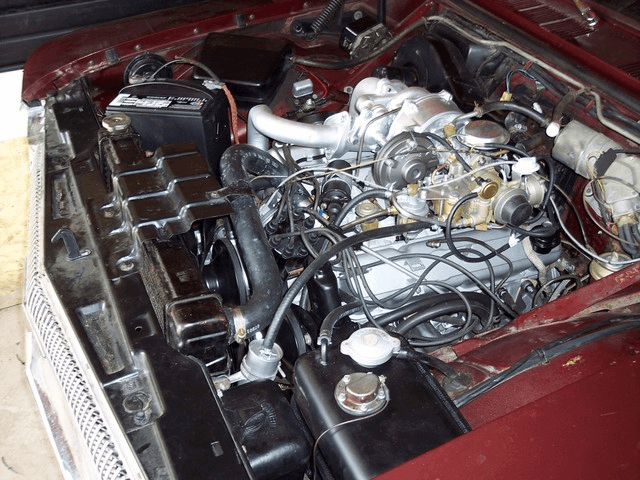
August 4, 2012 at 9:06 am #7455jensenracing77Participantit is in the car now. i should be firing it up tomorrow. i have a little wiring and vacuum/fuel lines to run, and the radiator to install and it should be ready. you would think with a lift i wouldn’t have to crawl around on the floor. i got stuck in a situation to where i had no choice but to just get dirty.
Attachments:
You must be logged in to access attached files.
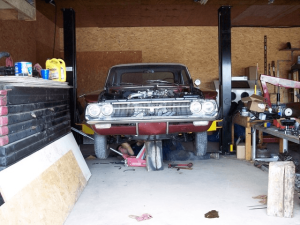
August 5, 2012 at 9:03 am #7456jensenracing77ParticipantIT’S ALIVE!!!!
it didn’t take much at all to get started. i broke in the cam and done some tuning most of the day. i took it on two drives in the country totaling 18 miles and never got over 190 degrees in 95 degree weather. i have ran into a timing issue. i have it set at 10 degrees with the vacuum advanced unhooked with no problem but when you hook up the advance it goes to 30 degrees. the book said it should only go to 13 with a 17 inch vacuum. (if i am reading it right)
i have right at 17 inch vacuum at idle. i have not took the cap off yet but don’t know if the advance is adjustable. the threads were real week where the line screws into the advancer so i hate to unhook it to many times. i have a dead spot in the pedal but hope the vacuum advancer issue is the reason for it. also need to make some more TV rod adjustments. looks like i will have it ready for the nice fall weather.
Attachments:
You must be logged in to access attached files.
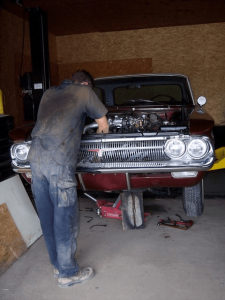
August 5, 2012 at 9:09 am #7457jensenracing77Participantdon’t look to hard Jim, i haven’t changed my T substitute in this picture yet… :whistle:
August 5, 2012 at 10:39 am #7458macf85ParticipantCongratulations! Good luck getting it dialed in. I bet your wife is happy.
August 19, 2012 at 3:17 am #7481jensenracing77Participantafter working out some bugs i have got this running great! i found a bad plug wire and the coil did not have the right resistance. the coil was not original. i even have the hydromatic shifting excellent! many many hours on this project from beginning to end but well worth it. i have one more bug to work out, i am leaking rocket fluid somewhere.
-
AuthorPosts


- You must be logged in to reply to this topic.


