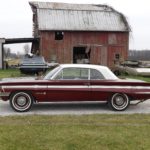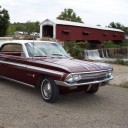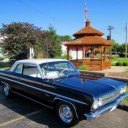
Home Page › Forums › Discussion Topics – Ask the Experts › Restoration of our 62 4 speed Jetfire
- This topic has 209 replies, 9 voices, and was last updated 3 years, 3 months ago by
 jensenracing77.
-
AuthorPosts
-
July 26, 2019 at 2:48 pm #15003
 jensenracing77Participant
I have the engine, transmission, suspension, tank, and many other parts removed from the bottom side. Still need to pull the fuel and brake lines, and all the firewall parts. The rear end is loose and ready to come out. I have another front suspension setup I will bolt into the car to get it loaded on the trailer and to the body shop. Will pull the rear end and front suspension setup back out at the body guys place to put it on his rotisserie.
Attachments:
You must be logged in to access attached files.
July 29, 2019 at 7:30 pm #15007 jensenracing77Participant
I have all the dash and firewall apart now. it is just almost ready for the body shop. I talked to the body guy to see if he has room for it. He is not starting on it till near winter but I need room to work on the other stuff. He said he can take it as soon as I am ready. It will be his first car through the new shop.
Has anyone removed the upper drip rail stainless trim? I tried on a parts car and not sure if removing it is a good idea. I have taken it off many other years but this one is more difficult. I may leave them on and have to tape them off. That said, every original paint car i have found has some body color paint on them in some areas. I assume these were installed before paint at the factory? If I leave them on I am going to have to do a quality sand and polish on them before taking the car to him. I don’t want to do that after paint.
Attachments:
You must be logged in to access attached files.
July 30, 2019 at 5:47 pm #15009 macf85Participant
I took my car all the way down to bare metal so I removed the trim. It was a PITA and I used several different size screwdrivers and a couple of plastic paint scrapers and a lot of patience. I have a Cutlass so I had to remove the snap on stainless trim around the windows too. I got everything off without damaging it. I bought all the polishing equipment from Eastwood and re-polished all of the stainless trim myself. Had to remove a few dents in the side trim and rocker trim and did pretty good. I know where they are but nobody else does. They also have polishing compound for plastic so I polished the tail light and turn signal lenses. I was more concerned with damaging the new paint when I reinstalled all of it. It turned out well and was worth the extra time.
July 30, 2019 at 7:03 pm #15010 JimNoelParticipant
Hi Eric,
Yes, I removed all the trim also, rain gutter SS trim too! Not easy but glad I did it. Also used primer close to final body color for better effect.
JimAttachments:
You must be logged in to access attached files.
July 31, 2019 at 2:18 pm #15014 jensenracing77Participant
Thanks guys. I went out this morning to my parts cars and give it another try. One of the parts cars had a bad one so I tried to take that one of first. I got much rougher with it and was able to figure out how to do it. I am use to the ones on the 70-72 cars and those are much more delicate. I took one good one of each side off from my parts cars and then went to the Jetfire and got them off also without hurting them.
The original fuel door was rusted in the seam like most are so I found a rust free one from Nevada. It had both screws broken off so I disassembled the hinge area and replaced that plate with the one from my car. These are difficult to completely coat inside the seams and inside all the hidden areas and I have seen some fuel door hinges on restored cars have rust on them. I decided to zinc phosphate these parts before I put it together. This way it will at least have some protection inside the seams and also coat the entire thing well. This phosphate make a great primer also. I also drilled the Jetfire trim holes in it, Just wish I remembered to do that before I phosphated it.
I have found that phosphating is very simple to do so I am not sending my parts off to have that done any more. I will still have to send my parts in that are zinc plated, I don’t want to get into that.
Attachments:
You must be logged in to access attached files.
August 2, 2019 at 4:51 pm #15020 jensenracing77Participant
I dug out most of the seam sealer today and power washed it with some good degreaser. Still need to remove some more seam sealer. I also need to document where the back glass clips are located and remove them. Other than this, I need to clean the front and back glass frames from the sealers and then it will be ready for the body guy. I plan to take it to him next week sometime.
Attachments:
You must be logged in to access attached files.
August 2, 2019 at 9:22 pm #15024 oaklyssParticipant
Eric, thanks for this info. While you have the car apart, can you take some detail pictures of the 4 speed trans tunnel modification?
Thank youAugust 3, 2019 at 5:10 am #15025 jensenracing77Participant
Here are a couple from the bottom side. The back just overlaps with a large gap. They stuffed this large gap with some sealing compound and then seam sealer over the top of that on the top side. Looks like the factory used a torch to cut the hole but must have followed a strait edge or a machine because they are cut very strait and square. The metal was melted and not sheered. I will get better pictures but these are ones I already have on the computer.
Attachments:
You must be logged in to access attached files.
August 3, 2019 at 3:20 pm #15029 oaklyssParticipant
Thanks, that’s good info. My 63 looks to have cut with some type of power shear, very straight like from a template. Curled metal still attached in some places.
Attachments:
You must be logged in to access attached files.
August 3, 2019 at 4:31 pm #15032 jensenracing77Participant
I guess I should look closer. At a glance it looked like melted metal but I guess it could be sheered. If so it looks like it was a dull blade.
-
AuthorPosts
- You must be logged in to reply to this topic.


