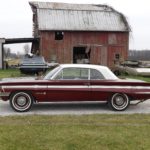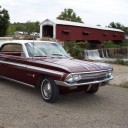
Home Page › Forums › Discussion Topics – Ask the Experts › Restoration of our 62 4 speed Jetfire
- This topic has 209 replies, 9 voices, and was last updated 3 years, 3 months ago by
 jensenracing77.
-
AuthorPosts
-
October 12, 2020 at 5:33 pm #17179
 jensenracing77Participant
The guy that rebuilt the water pump painted it and it didn’t look right. Just used some lacquer thinner on a rag and took it right off. I will use a Q tip to remove it in the little areas I couldn’t get to.
I also noticed the NOS fuel pump is clocked wrong. I will pop it apart and put it on correct.Attachments:
You must be logged in to access attached files.
October 14, 2020 at 6:19 pm #17187 jensenracing77Participant
I am getting there. I got the paint off the water pump so it look better now.
Attachments:
You must be logged in to access attached files.
October 22, 2020 at 12:00 pm #17193 jensenracing77Participant
Made more headway.
Attachments:
You must be logged in to access attached files.
October 23, 2020 at 8:09 pm #17200 graytoadParticipant
You certainly are making lots of headway lately: Great work Eric!
October 27, 2020 at 3:45 pm #17209 jensenracing77Participant
Just picked up the driveshaft from the shop and could not be happier! Before I took it I was not sure how I was going to make the ends look good after the new tubes were welded on. I knew they would not match the pretty new tubes. It is not “correct” but I decided to bead blast the ends and just dip the ends of the shaft in my phosphate solution. This way when he cut them off they would still look ok. I knew when he welded it that it would burn some of it but it actually done better than I expected. The ends I assume were bare steel when new but I am happy with the phosphate. The center CV I phosphated also and NOS one I have found were also phosphate. The splined slip joint is NOS and the phosphate on it matches mine pretty well. Three of the U joints are NOS because I got them cheep, he supplied the 4th one. I had him not paint it and I plan to clear it just as it is, over the hotter looking welded spots and all. I will add the paint stripe and yellow mark on the front as well. I can’t tell what color the strip was and the inspection information I have says the Jetfire shaft had no color stripe but I will put one on it where the original strip was at. Just have to decide color.
Attachments:
You must be logged in to access attached files.
October 28, 2020 at 4:19 pm #17212 jensenracing77Participant
Tank is in. It is not perfect but it is nice enough to make me happy. The inside is as nice as the bottom.
Attachments:
You must be logged in to access attached files.
October 31, 2020 at 9:13 am #17215October 31, 2020 at 8:33 pm #17216 graytoadParticipant
wow Eric, that is phenomenal!
January 17, 2021 at 3:35 pm #17295 jensenracing77Participant
For some reason I can no longer post pictures to this forum. Here is a video from a couple weeks ago.
January 17, 2021 at 3:37 pm #17296 jensenracing77Participant
Here is another video from last weekend when I started it up and broke in the cam. This weekend I have both front fenders and front bumper on. Most of the front end is together. I will try to post pictures again but it has not worked for a few weeks for me.
-
AuthorPosts
- You must be logged in to reply to this topic.


